Monthly Archives: August 2017

Meal Photography Tips

Meal Photography Tips

I never expected to be taking so many mobile phone pictures of meals from breakfast restaurants, but now, like many Instagram fans I cannot imagine not doing this.breakfast restaurant

It is almost as if I think of my phone as camera that has the additional feature of being able to call people, rather than the other way around. With my experience I’ve noticed there are some common mistakes that you see people making when shooting their meals when eating out or taking home for sharing on Instagram. So here are three tips to get your food photography popping.

Don’t use the flash.

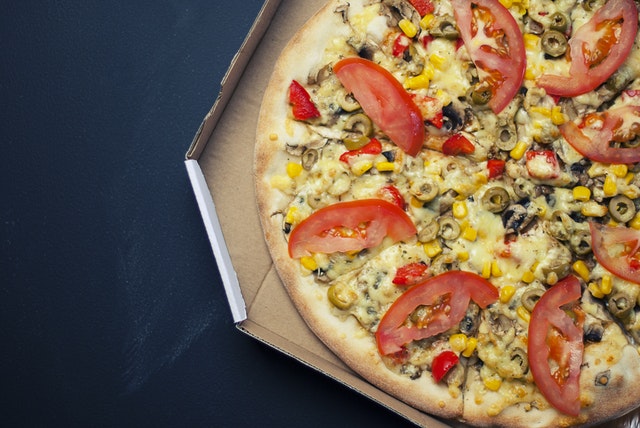
There’s something about flash and food which only makes the food seem like an autopsy report. I believe some folks also get too near. When you get too near food it will not look attractive. It looks like a science experiment. I will attempt to step back a little bit, actually attempt to set the food in the circumstance where it is being experienced at the restaurant. For instance notice in the photo below how I capture the wine as well? That’s because I was in the Yarra Valley and felt it was integral to where I was and the meal I was eating.

I shall [also] practically never place a filter on meals, since it has a tendency to skew the colours as well as the tones in an awkward way. There’s nothing attractive about a spinach salad using a reddish tint to it since you put on a classic filter.

wine yarra valley

Utilise Composition and Lighting

The most essential components are really composition and lighting. Whenever you’re taking a cell photo, you truly need to be certain that the surroundings you’re in has good lighting. If I am at a restaurant among the first things that I will do is ask if I could sit by the window or sit out. With food, the colours need to be correct or it does not seem like something you’d want to consume.

People are kind of hardwired to either like or dislike a food based on how it seems. Fantastic lighting will bring out the natural colours. When it’s something which we are familiar with and the colours do not seem like what we have previously experienced, it does not seem right. You wouldn’t wish to have a hot dog that’s blue. You’ve got these preconceived notions that a hot dog ought to be reddish.

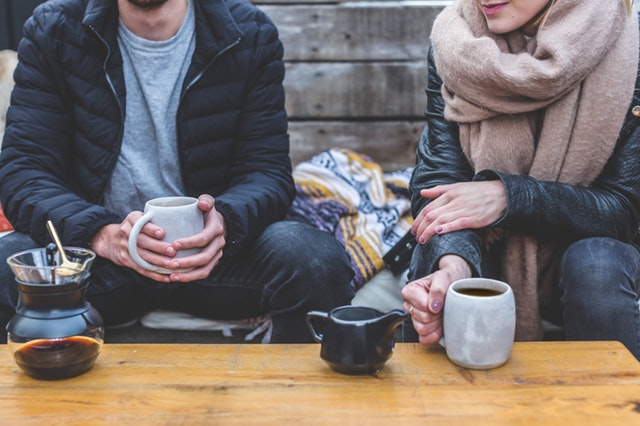
Express the Environment

There’s something particular about food which it sort of brings people together and that’s something which I attempt to integrate in my photographs. It is how food makes people socialize with each other which makes it kind of intriguing. By placing in this human component, a hand or an individual, even holding a cup of coffee and viewing two fingers at the backdrop, it makes it a little more approachable.

all day breakfast

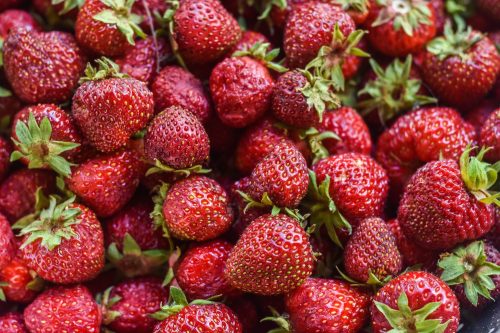
Personally, I love to shoot lunch or all day breakfast meals since light will be a good deal better earlier in the afternoon. I really like shooting coffee, but it is tough to find exceptional shots of the exact same drink everyday. Generally, food which includes structure to it will come out a little bit better.

Hopefully my tips are helpful, I think capturing meals is such a beautiful way to utilise photography as there is a certain enchantment to the way food is presented which is often forgotten about once you have finished eating. If you keep my three tips in mind hopefully you’ll capture some amazing photos. Good luck!

Food Photography Tips

Food Photography Tips

food photography tipsI am definitely not a professional food photographer, but my photos have improved with practice (lots and lots of it). Here are the top tips and tricks I can provide about food photography and equipment.

I am definitely not a professional food photographer, but my photos have improved with practice (lots and lots of it). Here are the top tips and tricks I can provide about food photography and equipment.

It is all about the light! My best suggestion for beginners is to become conscious of the strength of the light and the way that it hits the meals, and learn how to adjust accordingly. Below are some ideas for getting started.

Take photographs under natural light. Don’t use overhead lights or lamps or your own built-in flash. Ever!
Proceed to obtain the best light source. Do not feel restricted by just shooting photographs in your kitchen.
Try taking photographs from several angles. Some dishes of food look better from above (such as, pizza), or on the side (hamburgers), or at a 45-degree angle (beverages). Consider moving around the plate and taking photographs at different angles so that you can select your favorite later. Ask yourself does this napkin or busy background increase the ‘flavour’ of the picture or does it detracts from the it? Focus on what’s most important, but do not zoom in so close that audiences can not tell what the food is.

Troubleshooting Common Food Photography Difficulties

Keep reading for potential solutions.

Your photos are fuzzy. Blurry photos come from camera shake. Solutions include:

  • hold your camera steadier (easier said than done)
  • use a tripod with a remote so that your camera remains completely still while you are shooting
  • use a faster shutter speed, which will require opening up your aperture or moving into an area with more light or,
  • boost your ISO to lower the amount of light required (this will reduce image quality).

Your colours are not true to life. When you are editing your photos, if your plate of food appears really yellow, pink or blue or green, then you need to use your program’s white balance tools to repair it! Colors come alive when the white balance is set correctly. If you shoot in RAW format, you will have an easier time adjusting colour balance afterwards. Experienced food photographers use lenses that let them narrow their depth of field to highlight the topic of the photo. They then use photography applications to tweak the contrast, sharpness and levels of their photographs. Occasionally a few small edits can definitely make a picture pop.

What Camera to Use

You do not necessarily need a super fancy camera to take appealing food photographs. You can probably get by using a point-and-shoot camera for a little while if you use it well. Consult the user guide, use the macro setting and practice!

When you’re ready to get full control over your exposure and focal length, save up for a DSLR camera (that is short for digital single-lens reflex camera). It is an investment, truly!

If you can not decide between a Nikon DSLR or Canon DSLR, the differences between the two are fairly minimal. Comparable models will create photos of comparable quality, so select the best camera available in your price range.

Before you buy, read reviews and visit a local photography shop to try them out in person. If one brand’s cameras look more user friendly and feel more comfortable in your hand, go for that one. The lens that you use for food photographs are going to have more of an effect than the dSLR itself, so I suggest purchasing the camera lens and body individually.

You need more of an ‘eye’ than you need equipment. I have know people who buy expensive cameras and not know how to use them. In turn, the images they take are bloody awful. get to know your camera, get to know basic photography techniques and before long, you will be taking food photos along with the best of them.